
You can manually send emails containing your survey URL to survey participants, or create an email collector for a better tracking.
Create an Email Collector
- On the Dashboard page, click on the Send link for your survey.
- Click on the Add Email Collector link. An email collector will be created.
Send Email Invitations
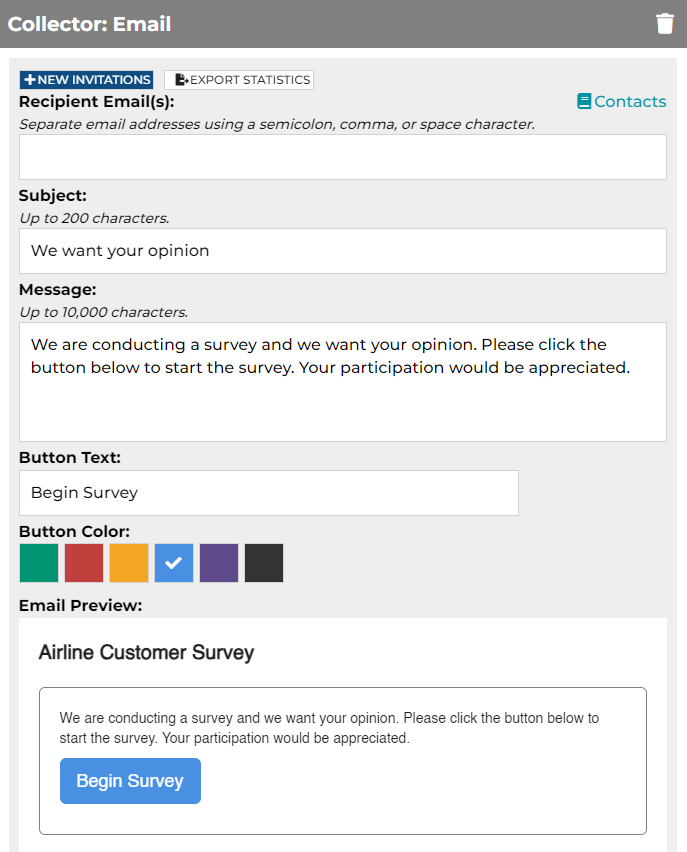
- Click on the + NEW INVITATIONS tag.
- Enter the recipient email(s). For multiple emails, use comma, semi-colon, or a space character as a delimiter to separate them.
- Customize the email subject and the email message as needed. For a more vivid and customized layout, you can apply text styles and insert custom data from your contacts to your email message.
- Enable Embed First Question as needed. This option is only available when the type of your first question is Multiple Choice, NPS, or Star Rating.
- Choose the Send Now option if you'd like your email invitations to be sent right away. Usually, it takes 1-2 minutes. You can also pick a later date and time to send your email invitations.
- Click on the Save button.
Keep in mind that your message should not exceed 4,000 characters. Copied text from Microsoft Word or other 3-party applications might contain a significant amount of formatting characters. Removing such formatting will keep your message concise and take up less space.
Your invitation emails will be put into an email queue to be sent on a "First Come, First Served" basis. For scheduled invitations, the scheduler will use your local date and time to determine when to send them out. You can monitor the statuses of your invitations on the page.
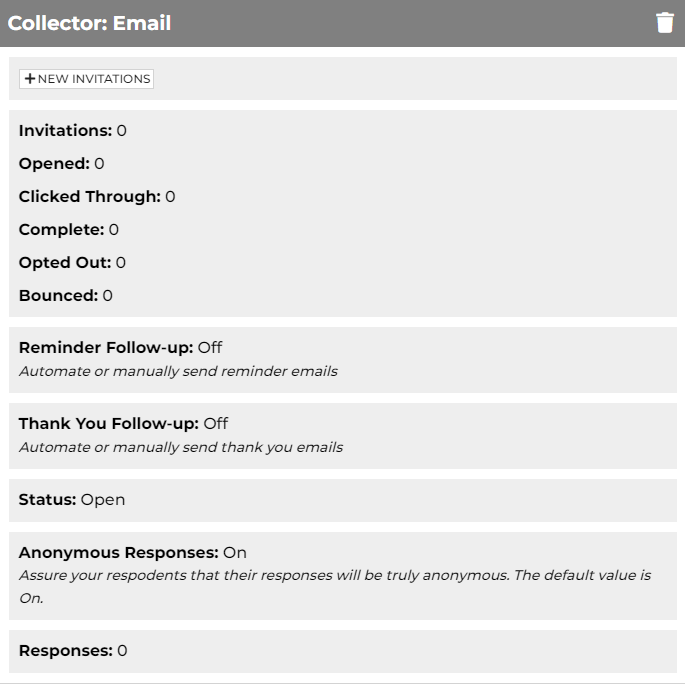
Email Invitation Tracking
You can easily track your email invitations. The glance view shows # of invitations, # of opened invitations, # of clicked-through invitations, # of complete surveys, # of opted-out emails, and # of bounced emails. The first three invitations will be displayed by default. Clicking on the More link will show you all invitations associated with the collector.
Each invitation comes with one or multiple labels to indicate the status of the invitation. Labels are displayed in different colors.
| Status | Description |
|---|---|
Scheduled |
The invitation was scheduled to be sent. |
Sent |
The invitation was sent. |
Opened |
The invitation was opened by the recipient. |
Clicked-through |
The recipient clicked through to the survey by clicking on the Begin Survey button. |
Started |
The recipient started to take the survey. |
Completed |
The recipient completed the survey. |
Bounced |
The email bounced and couldn't be delivered. |
Opted out |
The recipient opted out from receiving surveys sent through your SurveyOL account. |
Reminded |
The reminder follow-up email was sent. |
Thanked |
The thank you follow-up email was sent. |
![]()
Hovering over your status label can reveal the exact date & time when the status became available. In addition, you have the option of clicking on the EXPORT STATISTICS tag to export the status detail for all your invitations.
See also:
How to Manage Email Contacts
How to Send Reminder Emails
How to Send Thank You Emails
Email Opt Out
Email Opt In
Share the article:


Search for articles: