
Contact management enables researchers to easily store contact information, and use them in email collectors or SMS collectors. Bulk insertion is available from spreadsheet uploads.
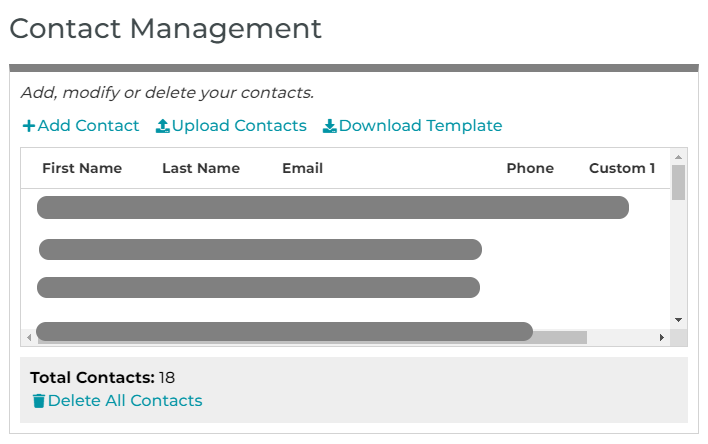
Manage Contacts
- On the My Account page, click on the Manage Contacts link under the Contact Management section.
- Download the spreadsheet template, if it is your first time to add contacts. The first row of your spreadsheet must be the title row. Email addresses are required for each row. You can also have first name, last name and up to 5 additional custom fields whose values can be embedded later in your invitation and follow-up emails.
- Once you have filled your spreadsheet with contact data, click on the Browse button or drag-n-drop your file to the rectangle drop area.
- If you need additional changes after uploading your contacts, you can modify your spreadsheet and upload again to add or update your existing contacts. You can also add, update, or delete contacts on the page.
Contacts can also be managed from the Tools or Send section of any of your surveys.
Insert Email Addresses/Mobile Numbers from Contacts (for Email/SMS Collectors)
- On the Dashboard page, click on the Send link for your design.
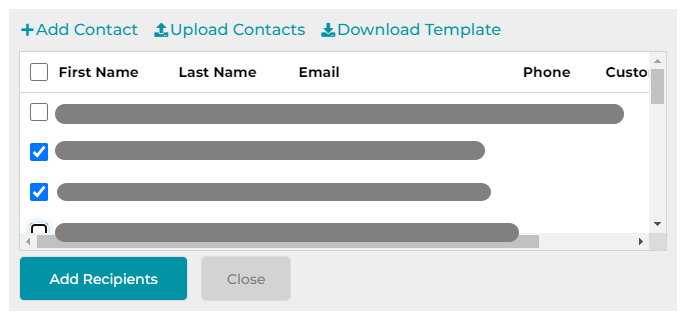
- Find your email/SMS collector, and click on the + NEW INVITATIONS tag, then click on the Contacts link.
- To add invitation recipients, check the checkboxes alongside your contacts. For bulk selection, you can check the checkbox alongside the first contact of your selection, then press the Shift key on your keyboard and hold it while checking the checkbox alongside the last contact of your selection. You can sort your contacts on the page as needed. The bulk selection may not be available for mobile users.
- Click on the Insert button to insert your contact email addresses or mobile numbers into the Recipients field of your email collector.
Share the article:


Search for articles: